高性能SDK套件 - C接口
接口概览
#define DLCV_API __declspec(dllimport)
#define DLL_FUNC(type) extern "C" DLCV_API type __stdcall

DLL_FUNC(const char*) dlcv_load_model(const char* config_str);
DLL_FUNC(const char*) dlcv_free_model(const char* config_str);
DLL_FUNC(const char*) dlcv_get_model_info(const char* config_str);

DLL_FUNC(const char*) dlcv_infer(const char* config_str);
DLL_FUNC(void) dlcv_free_model_result(const char* config_str);
DLL_FUNC(void) dlcv_free_result(const char* config_str);
DLL_FUNC(void) dlcv_free_all_models();
加载模型
代码样例:
std::wstring model_path = LR"(C:\Users\Administrator\Desktop\测试模型\det.dvt)";

json a;
a["model_path"] = model_path;
std::string json_str = a.dump();

const char* result = dlcv_load_model(json_str.c_str());

json result_a = json::parse(result);
dlcv_free_result(result);

int model_index = result_a["model_index"];
输入:
{
    "model_path": "C:\\Users\\Administrator\\Desktop\\测试模型\\det.dvt"
}
输出:
{
    "code": 0,
    "message": "Successfully loaded model.",
    "model_index": 0
}
模型推理
注意:彩色图像的通道顺序是 RGB。
样例代码:
cv::Mat img = cv::imread(R"(C:\Users\Administrator\Desktop\balloon.jpg)");

json image_info;
image_info["width"] = img.cols;
image_info["height"] = img.rows;
image_info["channels"] = img.channels();
image_info["image_ptr"] = (uintptr_t)img.ptr();

json d;
d["model_index"] = model_index;
d["image_list"].push_back(image_info);

auto json_str = d.dump();
auto result = dlcv_infer(json_str.c_str());
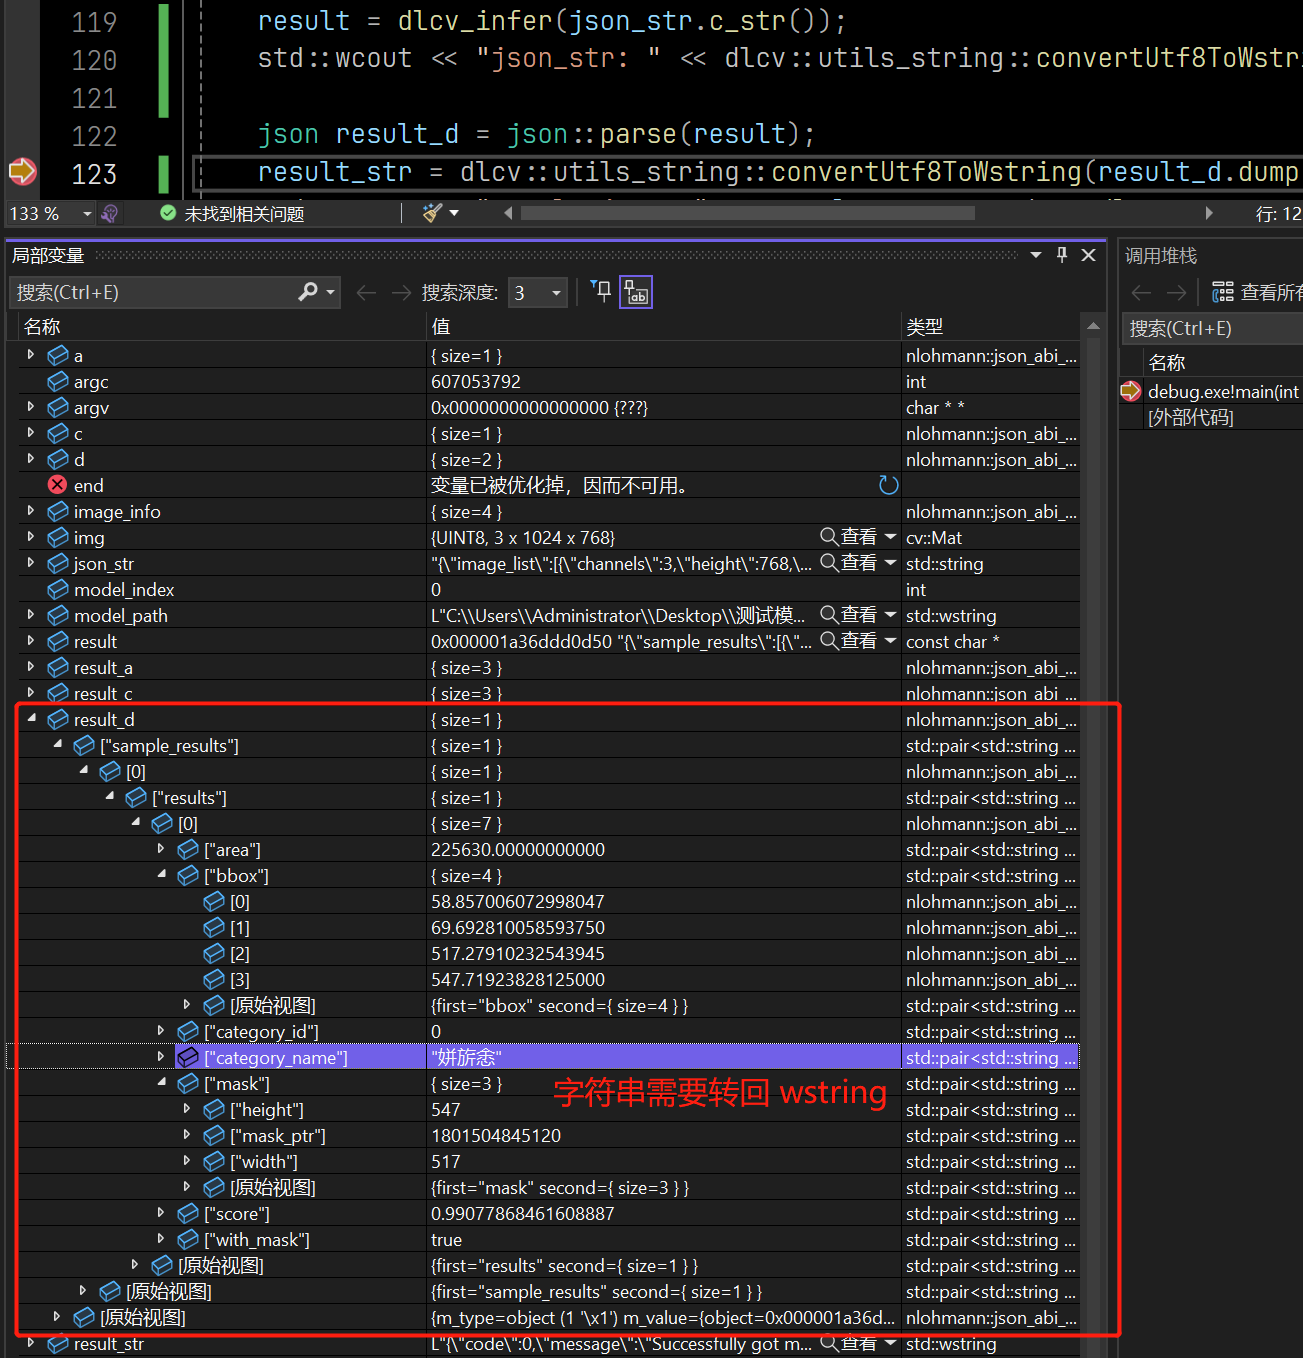
json result_d = json::parse(result);
dlcv_free_model_result(result);
model_index 是加载模型时返回的结果。
img 在调用过程中,不要释放内存。
注意:C接口需要手动调用 dlcv_free_model_result 释放结果。
输入:
{
    "image_list": [
        {
            "channels": 3,
            "height": 768,
            "image_ptr": 1978309283968,
            "width": 1024
        }
    ],
    "model_index": 0
}
输出:
{
    "sample_results": [
        {
            "results": [
                {
                    "area": 225630.0,
                    "bbox": [
                        58.85700607299805,
                        69.69281005859375,
                        517.2791023254395,
                        547.71923828125
                    ],
                    "category_id": 0,
                    "category_name": "气球",
                    "mask": {
                        "height": 547,
                        "mask_ptr": 1737551411232,
                        "width": 517
                    },
                    "score": 0.9907786846160889,
                    "with_mask": true
                }
            ]
        }
    ]
}
返回结果解析
- sample_results,列表,每个元素是一张图片的结果。
- results,列表,每个元素是一张图片中的物体。
- area,浮点数,物体的面积。
- bbox,列表,浮点数,物体的边界框,按照 x, y, w, h 排列,(x, y) 是左上角坐标,(w, h) 是检测框的宽度和高度尺寸
- category_id,整数,物体的类别 ID。
- category_name,字符串,物体的类别名称。
- score,浮点数,物体的置信度。
- mask,对象,物体的 mask。
- height,整数,mask 的高度。
- mask_ptr,指针,mask 的指针。
- width,整数,mask 的宽度。
Mask 解析
Mask 可以使用 OpenCV 直接实例化,如:
auto mask = cv::Mat(height, width, CV_8UC1, (void*)ptr).clone()
释放模型
使用 dlcv_free_model 接口释放模型。
model_index 是加载模型时返回的结果。
json b;
b["model_index"] = model_index;
json_str = b.dump();

result = dlcv_free_model(json_str.c_str());
json result_b = json::parse(result);
result_str = dlcv::utils_string::convertUtf8ToWstring(result_b.dump());
std::wcout << "result_json: " << result_str << std::endl;
dlcv_free_result(result);
输出:
{
    "code": 0,
    "message": "Successfully freed model."
}
释放所有模型
在整个程序退出之前,需要释放所有模型,可以手动释放,也可以直接调用 dlcv_free_all_models 接口。该接口无返回值。
dlcv_free_all_models();
数据结构定义
struct CMask {
    uintptr_t mask_ptr = NULL;
    int height = 0;
    int width = 0;
};

struct CObjectResult {
    int category_id;
    std::wstring category_name;
    float score;
    float area;
    std::vector<double> bbox;
    bool with_mask = false;
    CMask mask;
};

struct CSampleResult {
    std::vector<CObjectResult> results;

};

struct CResult {
    std::vector<CSampleResult> sample_results;
};
结果示例

内存管理
所有 C 接口的返回结果都需要手动释放,因为 C 没有字符串类型。C接口输入和输出都使用 json 字符串,输入可以直接用 json dump 出来的字符串的 c_str,输出也需要自己解析。
对于 dlcv_infer 接口,返回值需要使用 dlcv_free_model_result 接口释放内存,它会自动处理 mask 指针。其余接口都可以使用 dlcv_free_result 释放结果。
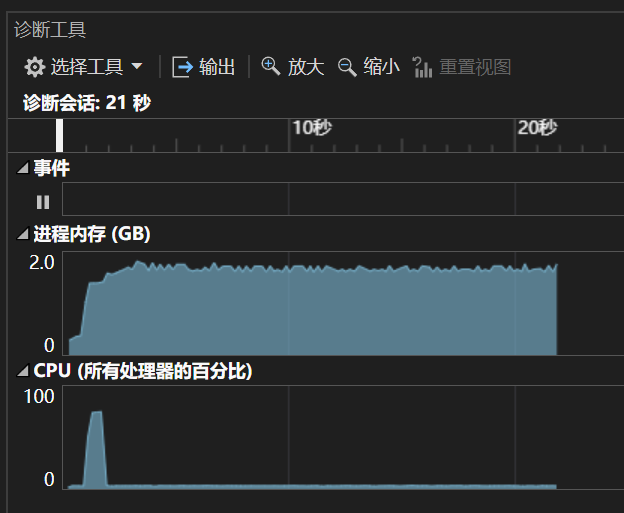
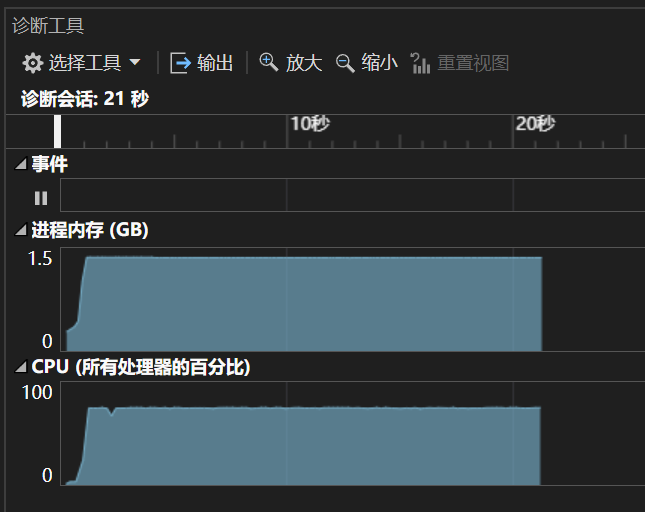
压力测试模型创建:

压力测试推理:
